|

Wheatgrass
is a fantastic, healty treat for your pet rat! You may have seen "Pet
Grass" in places like PetsMart and Petco -- it's just wheatgrass.
Usually, they try to make the product "last longer" by trimming
it. All the nutrition, however, is in that first growth... once you
see the blades start to turn yellow, it's pretty much done. I've seen
stores still try to sell trimmed, yellowed grass. They just don't get
it.
Instead
of paying all that money for a small pot of grass, though, you can VERY
easily grow your own at home from seeds! You'll save money, and get
more out of it. Here's how I made my very own little wheatgrass operation
at home!
Materials
- Wheatgrass seeds (I recommend Hard Wheat) - SproutPeople
- Shallow Rubbermaid container with lid
- 2 or 3 small drawer organizers
- "Baby Blanket" seed sprouting substrate - SproutPeople
- Optional: Sea Spray Liquid Kelp fertilizer - SproutPeople
- Optional: Rubbermaid beverage bottle or other container to mix liquid
fertilizer
(I don't recommend using it for food afterward)

Left to Right: Hard Wheat Seeds, Container, Drawer Organizers with pieces
of Baby Blanket cut to fit, Kelp Fertilizer, bulk piece of Baby Blanket.
The lid for the container is under the bulk baby blanket.
Directions
 Day
1 Day
1
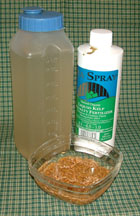
Wash the seeds in clean water, drain, and refill container to soak the
seeds for 8 to 12 hours (optional - soak seeds in Sea Spray solution,
shown at left). Line the tray with baby blanket, or a couple of layers
of unbleached paper towels. Saturate the liner with water and drain
off excess. Spread the soaked seeds as evenly as you can over the wet
liner. It should be approximately one layer of seeds. Put the tray in
the Rubbermaid container and lightly place the lid on top, to keep in
moisture. You can drill a few holes in the lid, if desired, for some
airflow.
Day
2 and 3
Lift lid and spray or sprinkle seeds to keep moist. They should be moist
but not standing in any water.
Day
4
Wheat should be starting to grip the towel or baby blanket. If firmly
attached, you may be able to lift the matting and pour some water into
the tray.
Day
5
Add water daily. The amount you will need will depend on the size of
your trays. Adjust to your conditions, more water if it seems too dry,
less if too wet. At this point I usually remove the tray from the Rubbermaid
container and allow it to grow on the windowsill. A small amount of
mold may appear in the tray or among the roots, especially in humid
conditions. This is OK.
 Day
6 to 9 Day
6 to 9
Continue adding water every day -- you can use Sea Spray solution for
some of the watering. You may need to increase the water quantity a
bit as the wheatgrass gets taller.
Day
10 and Beyond
Cut the wheatgrass as needed, with a scissors or sharp knife. Cut close
to the roots, but above any traces of mould that might be evident at
the root level. If you continue to water the wheatgrass, the remainder
will continue to grow for 5 or 10 more days as you use it. Once it starts
getting yellow blades, discard it. The second growth is not as nutritional
as the first, anyway, so it's not worth keeping.
Staggering
the Growth
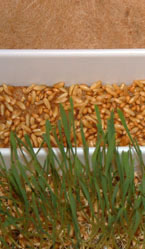
The reason I chose to do three smaller trays instead of one big tray
was to stagger the growth (shown at right). Since I only have four rats,
I don't go through it as much, so I don't need to grow it as often.
I often plant the next tray when I start cutting into the current tray.
If you have more rats, and go through it faster than I do, you can opt
for larger trays, or plant more often (say, when the current batch first
sprouts). Do whatever works for you and your colony.
HINTS
- Grows OK between 60F and 75F, ideal temperature is 67F.
- Avoid direct sunlight, bright indirect light is OK. Fluorescent light
is OK as well.
- Dry air is preferable to humid, if mould is a problem.
- A fan to move air might also be useful if mould is a problem.
- Wheatgrass can be cut as short as 3.5" tall, may get 7 or 8 inches
tall.
|


 Day
1
Day
1  Day
6 to 9

